MAKE A NEST PROTECTOR
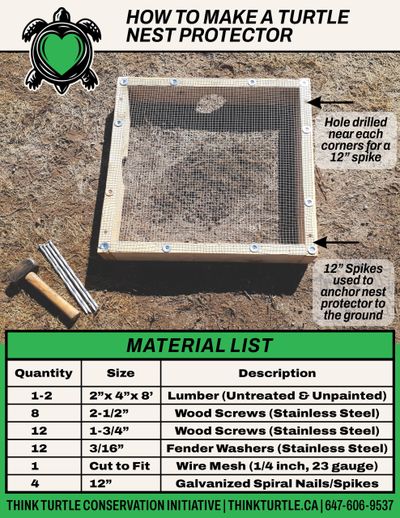
HOW TO MAKE A TURTLE NEST PROTECTOR
The following are instructions for constructing a standard wood frame nest protector. This vital tool, successfully used by the Think Turtle Conservation Initiative for several years, plays a crucial role in deterring predators and protecting many nests. If you substitute materials or make changes to the methods of construction outlined, please keep the general principles of a turtle nest protector in mind.
(A) Use lumber that is untreated and unpainted. This is to ensure that no harmful chemicals or toxins are introduced into the turtle's environment.
(B) Cut '2 to 4' openings in the wood frame big enough for the hatchlings to freely exit the nest protector. This is a 'requirement' specified by the Ministry of Natural Resources & Forestry and the Ministry of Environment, Conservation & Parks.
(C) To maximize protection, Make the nest protector frame larger than the nest's size. We recommend a nest protector that is 27" x 27".
(D) Securely anchor the nest protector to the ground to prevent predators from gaining access to the nest during the incubation period. If spikes cannot be used to anchor the nest protector, each 'corner' of the nest protector can be weighed down using heavy rocks.
TOOLS & EQUIPMENT
Power Saw (of your choice for cutting the lumber)
Jigsaw (for cutting exit holes for hatchlings)
Drill (cordless or electric)
Drill bit (recommended for making pilot holes if you choose to)
Screw bits (size/type for the screws you are using)
Measuring tape, Carpenters pencil, Square
Metal Snips
Screwdriver (size/type to match screws, we used Robertson)
Sandpaper
Safety goggles
Work Gloves (for handling hardware cloth/wire mesh)
Ear Plugs (when using machinery)
MATERIALS
You will need the following items to build one nest protector.
2" x 4" x 104" Lumber (Untreated/unpainted)
Hardware cloth/wire mesh (23 gauge with 1/4" hole openings)
2-1/2” Stainless steel wood screws x 8
1-3/4” Stainless steel wood screws x 12
12" Galvanized spiral nails/spikes x 4
Optional: If you prefer, you can staple the wire mesh to the top of the wood frame. In that case, you will need a staple gun and staples.
Note: As the nest protector will be used outdoors, we highly recommend stainless steel screws and galvanized spikes to avoid rusting. These materials are chosen for their durability and resistance to corrosion, ensuring the longevity of the nest protector.
NEST PROTECTOR ASSEMBLY
(1) From the 2" x 4" x 104" lumber, cut two pieces 24" and two pieces 27"." With minimal waste, one turtle nest protector can be constructed from one 2" x 4" x 104".
(2) Using a jigsaw, cut two half-circle exit holes. Each one should be big enough that the hatchlings can quickly exit the nest protector. We cut the openings 2" high and 4 -1/2" wide. Cut the 1st half circle in one of the 24" pieces of cut lumber and the 2nd half circle in one of the 27" pieces. Each nest protector must have at least two cut-out holes for the hatchlings to exit the nest protector. Please use safety goggles and earplugs to ensure a safe and successful construction process.
(3) Drill two holes in each 27" piece of cut lumber. The 1st hole should be drilled 3" in from the end and through the 4" dimension. The 2nd hole should be
drilled 3" in from the other end and through the 4" dimension.. These are the holes the 12" spikes will be hammered through to anchor the nest protector to the ground.
(4) Assemble the wood frame using 2-1/2" wood screws.
(5) Cut the wire mesh (hardware cloth) to fit the assembled wood frame. Note: We cut the wire mesh 1" to 1-1/2" larger than the dimensions of the wood frame so the wire mesh edges can be folded over for a tidy and safe edge and provide extra reinforcement when screwed onto the top of the wooden frame.
(6) Place the wire mesh over the top of the assembled wood frame and fasten it in place using 1-3/4" wood screws fitted with a 3/16" fender washer.
We have included photos and notes below regarding exit holes, reinforcing mesh, anchoring the nest protector, hardware cloth gauge, and chicken coop wire for additional reference.
Check out a larger copy of our 'How To Make A Nest Protector' poster on the Think Turtle WordPress Blog.
https://thinkturtleconservationinitiative.wordpress.com/2022/03/30/how-to-make-a-nest-protector/
WHERE TO PURCHASE A NEST PROTECTOR
By building and using a turtle nest protector, you are making a significant contribution to turtle conservation.
If you have any questions or concerns about a turtle or nest, please phone or text Think Turtle Conservation Initiative at 647-606-9537 when you are with the turtle or nest. For additional information about helping turtles, we have a variety of platforms for you to choose from—check out our other web pages at www.thinkturtle.ca, follow us on Facebook, or read our WordPress Blog posts at https://thinkturtleconservationinitiative.wordpress.com.
Thank you for being a friend to the turtles and helping protect Ontario's species at risk, and their habitat.
Link for this graphic and materials list inclded at end of webpage.
CONSTRUCTION TIPS (Exit holes)
Method #1 make exit holes using a hole saw.

Method #2 make exit holes using a jigsaw.

CONSTRUCTION TIPS (Reinforced Edge)
Cut away a mesh square at each corner.
Fold mesh over to make a reinforced edge.
Fold mesh over to make a reinforced edge.
Fold mesh over to make a reinforced edge.
Fold mesh over to make a reinforced edge.
Fold mesh over to make a reinforced edge.
CONSTRUCTION TIPS (Anchoring)
Drill a hole through the 2' x 4' wood frame.
Drill a hole through the 2' x 4' wood frame.
Drill a hole through the 2' x 4' wood frame.

Hammer 12" spike through hole to anchor.
Drill a hole through the 2' x 4' wood frame.
Drill a hole through the 2' x 4' wood frame.
ANCHORING TIPS
Anchoring A Nest Protector Into a Firm or Loose Substrate
Firm Soils
Turtle nest protectors are most successfully anchored to the ground using 12" galvanized (spiral nails) spikes. They are readily available at most hardware and buildall stores. On occasion, it might not be possible to use a spike to secure one corner of a nest protector or any at all because the subsoil layer contains varying-sized rocks, and attempts to hammer a spike in were unsuccessful, having hit the rock. If you cannot drive a spike into the ground, forego the spike and weigh that corner of the nest protector down with a heavy rock. If unable to use spikes to anchor, use heavy rock positioned on each corner and, if necessary, the sides; be sure to leave the center of the mesh uncovered. Hence, the nest has full access to the sun, rain, and air circulation, which all have a role in developing the turtle eggs during incubation.
If installing a nest protector even remotely near a road that you have explicitly received "permission" to do, we do not recommend using rocks to weigh a nest protector down for safety. Should a rock end up on the road through human interference, animal, weather events, etc., it could cause a motorist to have an accident. The person who installed the nest protector in this manner could be held responsible and liable for any damage or injuries caused. You will need to look for other ways to protect the nest. We have an article about Predator Deterrents on our website. You may find some information in it helpful. https://thinkturtle.ca/predation-deterrents
Please understand that we cannot guarantee these methods will safeguard a nest from predation; however, in our experience, attempting something versus nothing may be enough to help save the nest.
Sandy or Loose Soils
Installing nest protectors in sandy or loose soils is often the case as turtles are attracted to this substrate composition because it is easy to dig a nest and will hold the sun's warmth, making ideal conditions for the incubation period when a turtle embryo is developing.
Although it is the perfect substrate for the female turtle to dig a nest and turtle eggs to develop, the downside is that it is difficult to anchor a nest protector securely into the ground because it is very loose. Anchoring a nest protector in some way is the best strategy to deter predators. A raccoon, fox, etc. that comes upon a nest protector, likely drawn there by the lingering scent the female turtle left behind, will attempt to shift the nest protector, meeting resistance in the form of a nest protector anchored securely into the ground might just be enough to prompt the predator to move on.
Tips for Anchoring a nest protector into a loose substrate
Installing a nest protector in sandy soil can be challenging, with numerous problems. Our best advice is to either expand the area protected or go deep.
Expand The Area Protected: After weighing down the corners of the nest protector and sometimes the edges, we surround the nest protector with rocks/stones on the ground like a border, and if able to surround the first border with a second border of rocks/stones, we do. The idea is that the nest is in the center of the nest protector, and by putting a border around the nest protector, the nest is that much further away from probing paws, beaks, and digging predators; in one case where we had a very persistent raccoon and placed 18" square flagstones around the nest protector to create an impenetrable border around the nest protector. The nest managed to get past predators in this situation. Note: As we are so busy when working outdoors we don't always take photos when we should. We added four rocks to this photo via photoshop to best illustration this nest protection method in practice.
Go Deep: Underneath the sand may be firmer, more cohesive soil. By harnessing the properties of this soil type and using long lengths of rebar, e.g., 36", you may successfully anchor a nest protector in sandy or loose soils. The rebar should be sledge-hammered into the ground alongside the outer frame of the nest protector on all four sides until it is flush with the top of the turtle nest protector frame. Fasten the rebar to the side of the nest protector with screws, washers, and perforated pipe strap commonly used in plumbing and HVAC applications. The strapping can be easily cut to the desired length and securely hold the rebar in place.
When hammering the rebar into the ground, even if the soil underneath doesn't feel as firm as hoped it might be, driving the length of rebar deep into the ground will help prevent the nest protector from being moved horizontally. We recommend placing hefty rocks on the four corners of the nest protector to alleviate possible verticle movement. There is no guarantee this method will deter predators; a determined predator could dig under a nest protector easily if deterrents don't put them off. However, most often, a nest protector anchored and secured in this way should create enough resistance that an animal looking for an easy meal may be disappointed and move on.

Nest protector weighted down with rocks and site protection expanded.
WIRE MESH & CHICKEN COOP WIRE
WIRE MESH NOTES
We use 23 gauge hardware cloth (wire mesh) with 1/4” hole openings for the nest protectors we construct, sell, lend out and/or install. Another wire mesh option is 19 gauge with 1/2” hole openings. Either gauge can be used with each having slightly different attributes to consider.
1/4" (23 gauge) - In areas turtles are more inclined to nest in soil with zero to minimal vegetation wire mesh with 1/4" openings is a good choice and may offer the nest the tiniest bit of shade during the hot dry summer months a nest with very little if any vegetation may benefit from. e.g. road shoulders behind guardrails, beaches, sandy areas in parks, etc.
1/2" (19 gauge) - In areas turtles are more inclined to nest in soil with moderate to dense vegetation wire mesh with 1/2" openings is a good choice and will allow vegetation to grow through the openings during the hot summer months. e.g. lawns, road shoulders behind guardrails, fields, etc.
Most important is to use a wire mesh that predators are not able to gain access to the nest and/or it acts as a hindrance putting predators off pursuing attempts to get to the nest.. In the end using either gauge versus not using a nest protector at all is the best chance there is of saving nest from predation especially during the first 10 to 21 days when a turtle nest is most vulnerable to predators..
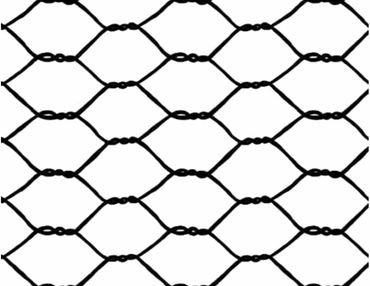
CHICKEN COOP WIRE
We 'do not' recommend using chicken coop wire for turtle nest protectors. Although a useful wire product the openings are big enough that snakes, mice, rats and other small predators can access them and get to turtles eggs.
Using chicken coop wire without meaning to can leave a turtle nest vulnerable to predators. (1) Any mammalian predators can chew/rip through chicken coop wire. (2) In addition to this raccoons, foxes, coyotes, skunks, wolves, opossums and determined birds can access the nest enough through the larger wire openings enough to access some of the eggs near the top of the nest causing damage to at least some of the eggs. (3) With chicken coop wire being very pliable even if a raccoon that doesn't get to the eggs they could cause enough damage to leave the nest vulnerable to other predators. (4) If the chicken coop wire is not secured tight enough a raccoon could pull the wire back enough so they have full access to the turtle eggs and a meal. (5) Even dogs and cats have been known to make attempts to access nest protectors each for their own reasons not necessarily to go after eggs. Curiosity is in itself enough to prompt such activities and cause damage to the turtle eggs.
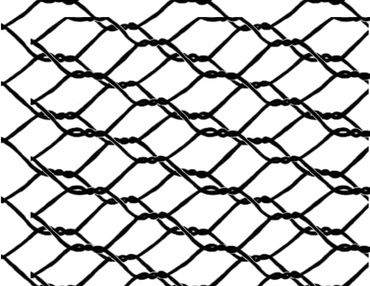
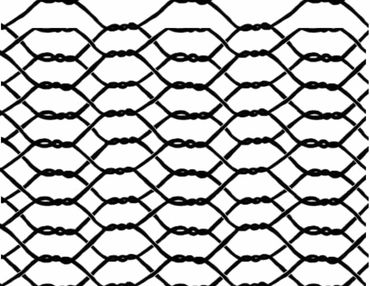
That being said sometimes hardware cloth is not available and chicken coop wire is a material many people have stashed away, and may be looking to use to save money. If you are considering using chicken coop wire instead of hardware cloth we suggest securing one layer of chicken coop wire to the top of the nest protector frame (stapling is easiest) and then a second layer stapled in place on top of the first layer in such a way that it dissects the large openings in the first layer, making smaller openings overall (see photos below)..

Help protect turtle nests from predators by using a nest protector!
CHICKEN COOP WIRE (LAYERING)